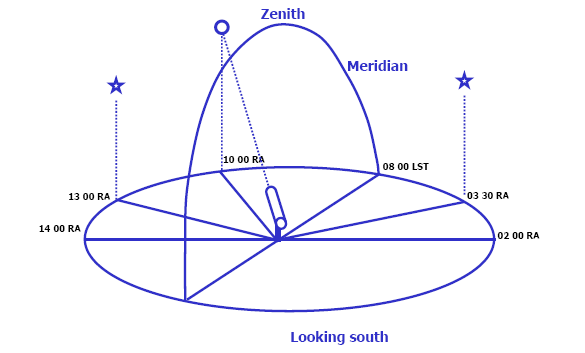
Table: Messier and Caldwell list slews from bright stars above -38° dec by Messier Caldwell number sorted by constellation
Table: Messier and Caldwell list slews from bright stars above -38° dec by Messier Caldwell number
Table: Messier and Caldwell list slews from bright stars above -38° dec by bright star name
Table: Messier and Caldwell list slews from bright stars above -38° dec by right ascension
Spreadsheet (Excel): Messier and Caldwell list for alt-az slews from bright stars (2.5 megs)
Cartes du Ciel: External catalogue - bright stars and Messier-Caldwell list above -38° dec
Concepts
Purpose
|
With GOTO computerized scopes being so prevalent, basic use of manual setting circles (also known as analogue setting circles) on a German equatorial mount (GEM) is not well covered in manufacturer instructions or basic astronomy books. This cheat sheet describes how to use manual setting circles. A reference table of bright stars with Bayer and Flamsteed numbers is provided here to aid in using manual setting circles. A table and spreadsheet of pre-computed slews for the Messier list and for the Caldwell list above -38° declination are provided. In aid of computerized GOTO small scopes, some of the tables include for bright reference stars, the identification cross-reference numbers to the HD and SAO catalogues. HD (Meade) and SAO (Celestron) handcontrollers typically contain one or both of these stellar catalogues. For GOTO resynching of a hand-controller, the table titled "Messier and Caldwell list slews from bright stars above -38° dec by Messier Caldwell number" is helpful. With this list, the telescope user can slew to the nearest bright star to the object, resynchronize their GOTO controller to that bright star and then slew the few remaining degrees to the faint object. Resynchronization of the hand-controller allows for high-accuracy slewing, in particular, for urban and suburban light polluted skies. Some astronomical planning software, like AstroPlanner, build in intermediate bright star slewing utilities that automate the resynchronization process. Basic conceptsManual setting circles best work by making short right-angle slews from bright-star targets. The telescope is centered on a bright star with known coordinates. The setting circles are adjusted to show the (1) known right ascension and declination of the target bright star, or to (2) zero (0 °) right ascension and zero (0 °) declination. |
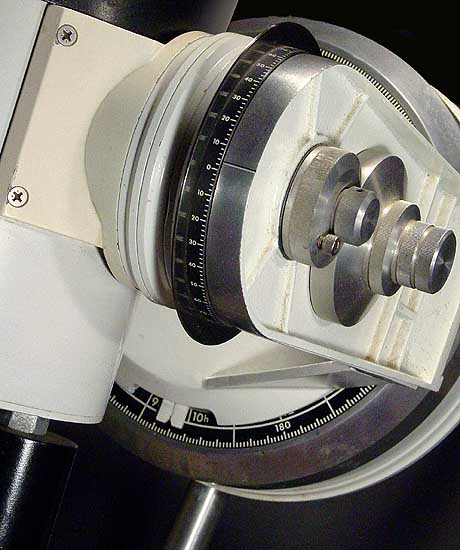
Declination and right ascension setting circles on a high-end mount - GNU Wikipedia Image by Halfblue |
A short slew is then performed to move the scope either to (1) the direct right ascension and declination coordinates of the target or (2) the indirect index (offset index) between the bright star and the target. Special cases for indirect index slews involve where the bright reference star and object are on the same right ascension or declination great circle. These special cases are called (3) "right ascension sweep" and (4) "declination sweep".
As any of these techniques will rarely put the target exactly on center with visual observing alignment tolerances, this technique is supplemented with traditional star hopping. The use of bright stars with manual setting circles is similar to alignment stars in 1, 2 and 3 star computerized GOTO alignment.
Assumed skills
Required resources
- A bright star chart
Some choices include:
- Tirion, W. and Skiff, B. Tirion Bright Star Atlas. Willman-Bell (accessed Sept. 2007).
- Tirion, W., Sinnott, R.W. 2000. Sky Atlas 2000. Sky Publishing (accessed Sept. 2007).
- Tirion, W. 2001. The Cambridge Star Atlas. Cambridge Press. (accessed Sept. 2007).
- Pasachoff, J.M., Tirion, W., Peterson, R.T.(ed). A Field Guide to Stars and Planets. Peterson Field Guides (accessed Sept. 2007)
- Uranometria 2000. Willman-Bell (accessed Sept. 2007).
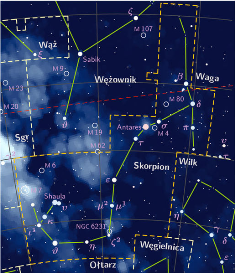
Star Chart - Wikipedia GNU Image by T. Bronger
- A bright star table with J2000 coordinates
Easy use of manual setting circles is dependent on having a good Bayer name list of bright stars above magnitude 4.5 that also lists the J2000 or epoch-to-date coordinates of each star. The list should be in hardcopy and sorted by constellation for ease of reference in the field. Bright star lists in several popular publications either do not have lists of sufficient star density or magnitude depth to allow for easy lookup. Tirion's Cambridge Star Atlas has a list of the 95 brightest stars, ordered by magnitude, down to about magnitude 2.5. Peterson's Star Guide and the RASC Observer's Guides have a comprehensive bright star list based on Garrison's catalogue of absolute magnitudes. Garrison's catalogue typcially contains 315 stars in both hemispheres down to a magnitude of 3.5. This is too low a density for use with setting circles (approx. 150 per hemisphere). These lists omits stars in some faint constellations, e.g. Capricorn, that only have faint stars.
A well-sorted comprehensive bright star list supplements the observer's preferred star chart which may identify the bright stars but not easy reference the J2000 coordinates for each bright star.
Some online bright star lists available on the internet that have both a good breadth and good order (Bayer and Flamsteed name within constellation) are:
- Richard
Powells' Brightest Star List
http://www.atlasoftheuniverse.com/stars.html accessed Sept. 2007. Lists 300 brightest stars to magnitude 3.5. Can be imported to Excel and resorted by right ascension and declination. - UNSO Astronomical Almanac Bright Star List
http://asa.usno.navy.mil/SecH/brightstars.html accessed Sept. 2007. Is available in pdf and ASCII tabular format for importing, sorting and filtering in Excel. - UNSO Astronomical Almanac Bright Star Search Server
http://asa.usno.navy.mil/SecH/bss.html accessed Sept. 2007. Will generate a list of bright stars, filtered by right ascension, declination and magnitude. That the list can be filtered by declination is useful for preparing charts for the latitude of your observing point. - Harvard Bright Star Catalogue 5th Ed.
http://vizier.u-strasbg.fr/viz-bin/VizieR?-source=V/50 accessed Sept. 2007. Can be used to generate filtered bright star lists by magnitude and declination in ASCII format for import into Excel. - HD-DM-GC-HR-HIP-Bayer-Flamsteed Cross Index (Kostjuk, 2002)
http://vizier.u-strasbg.fr/viz-bin/VizieR?-source=IV/27 accessed Sept. 2007. Can be used to generate filtered bright star lists by magnitude and declination in ASCII format for import into Excel. - UNSO Astronomical Almanac Bright Star List
Most of these lists can easily be imported into an Excel spreadsheet for easy sorting and filtering.
To aid northern North American observers near 41° North latitude, a filtered list of 638 bright stars down to magnitude 4.5, above -38° declination and sorted by constellation name and Bayer identification is provided here. The list is based on Kostjuk 2002. The list is limited to stars that have either a Bayer or Flamsteed identifier. (Html; pdf).
- Richard
Powells' Brightest Star List
- A low-power eyepiece with a precomputed true-field-of view
Once the scope is positioned using direct or indirect indexing, the target is acquired using the lowest feasible power eyepiece. Low power eyepieces yield the widest true-field-of-view (TFOV). A favored low-power eyepiece, typically 32mm, is used. Right ascension and declination can be measured by counting off the number of TFOV eyepiece views that the eyepiece traverses. To translate eyepiece views to right-ascension or declination, the TFOV of your favored eyepiece will need to be found by the following procedure:
- Lookup the apparent-field-of-view (AFOV) from your eyepiece manufacturer's website. Typically, the AFOV will be between 47° and 52°. If you cannot find a catalogue value, assume an AFOV 50°.
- The TFOV of the eyepiece is equal to the AFOV divided by magnification. TFOV=AFOV/M. Magnification is equal to the focal length of the telescope divided by the focal length of the eyepiece. TFOV=AFOV/(D_fl/EP_fl)=AFOV/M.
A worked example: I use a 32mm eyepiece with a 52° AFOV on a 1200mm fl telescope. The TFOV for that combination of eyepiece and telescope is:
1.4° = 52° / ( 1200 mm / 32 mm ) = 52° / 37.25x
Desireable resources
- Drafting or divider calipers
Dividing calipers are used to step off the number of eyepiece views between the bright star and target, as shown on your star chart.
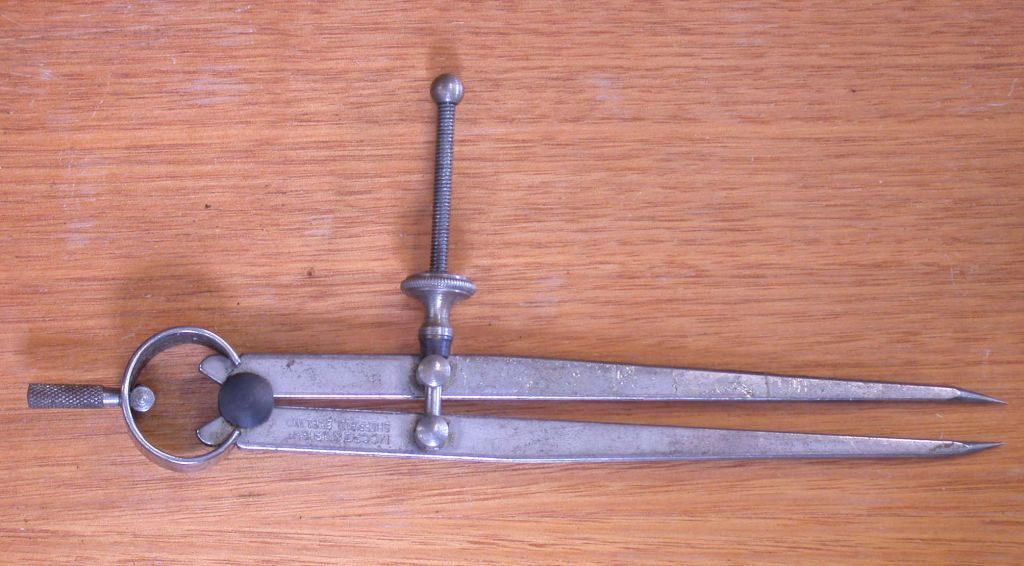
Dividing calipers - GNU
Wikipedia Image by
G. McKechnie- Extra watch set to local sidereal time
Before a night's observing, set a watch to local sideral time. This is the equal to your right ascension on the southern half of your meridian. The telescope is pointed at a star on the meridian and the right ascension manual setting circle can be adjusted accordingly. The USNO Local Sidereal Time Calculator can be used to set a secondary watch to local sidereal time on the observing night.

Watch - GNU Wikipedia Image by R. McLassus
- Hand-magnifying glass
A hand-magnifier helps in read small text on charts by a dim red astronomy flashlight.

Hand-magnifer -
GNU Wikipedia Image
by Tomomarusan
Adding supplemental index marks to your telescope
Manual setting circles typically have two sets of reversed index scales. One reads from zero to 24 hours right ascension; a second reads reversed from 24 hours to zero hours right ascension. The upper scale usually is for use in the northern hemisphere and will match the progression of right ascension hours that you see when facing the south horizon.
As a general rule for mid-price range mounts, basic mounts designed only for non-GOTO use are the easiest to use and read. The more compatible a mount is for a GOTO upgrade, the less the manufacturer is concerned about making the mount's manual setting circles user friendly. See illustration in the following mounts.
Manual setting circles can come in two flavors - relative and direct indexing.
In the first type - direct indexing - illustrated by the Orion EQ2 basic mount or the Orion Altas, the right-ascension setting circle moves with the scope and the right-ascension indicator remains fixed on the bottom half of the right-ascension portion of the mount.
In the second type - relative indexing - illustrated by the SkyView Pro EQ5, the right-ascension setting circle remains fixed. The right-ascension indicator moves above the fixed position setting circle on the bottom half of the right-ascension portion of the mount.
For both types of scopes, the indicator arrow on the right ascension tube and the declination tube can end up in hard-to-read positions.
A useful modification is to add indicator point lines at 120° intervals. To make a useful temporary mark, simply use copier white-out. If you are dissatisfied with the marks, rubbing alcohol will quickly remove them. Supplemental indicator markings can be made on both the right-ascension and declination barrels. Since all positions are made relative to any indicator line, having multiple indicator lines does not change the overall process of using a manual setting circle; it changes only the ease of reading the setting circle.
For the SkyView Pro EQ5 type mount, add three additional indicator marks on the right-ascension tube above the setting circle at 90° intervals. Add three additional indicator marks below the declination setting circle at 90° intervals.
For the Orion Altas EQ6 mount, make three additional indicator marks on the right ascension tube below the setting circle at 90° intervals. The Atlas EQ6 declination circle moves with the declination tube and the indicator is fixed on the right-ascension tube housing. Make the three additional marks on the fixed non-moving right-ascension tube below the declination circle. See the Supplemental Notes for a further discussion of marking the Orion Atlas (Syntax) EQ6 Goto mount.
For a basic mount like the Orion EQ2, after polaring aligning, point your scope at any star on the meridian. Then move your setting circle to the current local sidereal time.
Basic Technique
- Pre-compute the direct index coordinates or indirect index offset between
the reference bright star and the target
Three methods can be used to compute the size of the offset between a reference star and a target object - graphic, direct coordinates and indirect offset. Pre-computation and data lookup vary by the technique used:
- By the graphical method for indirect offset
The example above for M92 illustrates using a chart and measuring calipers to determine the rough of amount of the index offset by counting the right-ascension and declination offset in terms of eyepiece views and decimal degrees.
- By direct index coordinates
"Direct indexing" refers to setting the index circles to actual right-ascension and declination coordinates of the reference star and then the target object. To use the method, look-up the right-ascension and declination for both the bright reference star and the target object. E.g. for the M92 example above. Moving from iot Her to M92 involves a slight RA minus slew to the west and a minus declination slew to the south:
Table: J2000 Coordinates of iot Her and M92
Direction Object R.A. Dec. To M92 17h17m07" +43°08m11" From iot Her 17h39m28" +46°00m23" Change ~-22m ~-3° After pointing at the bright star iot Her and slipping the right ascension and declination circles to reflect that star's coordinates, the corresponding change in the right ascension setting circle that results from you moving the telescope to the target is illustrated as follows:
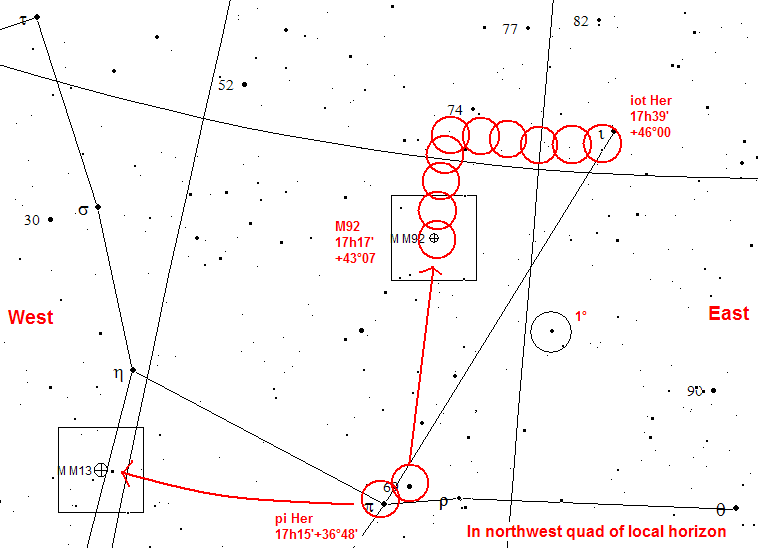
Slewing from iot Her to M92
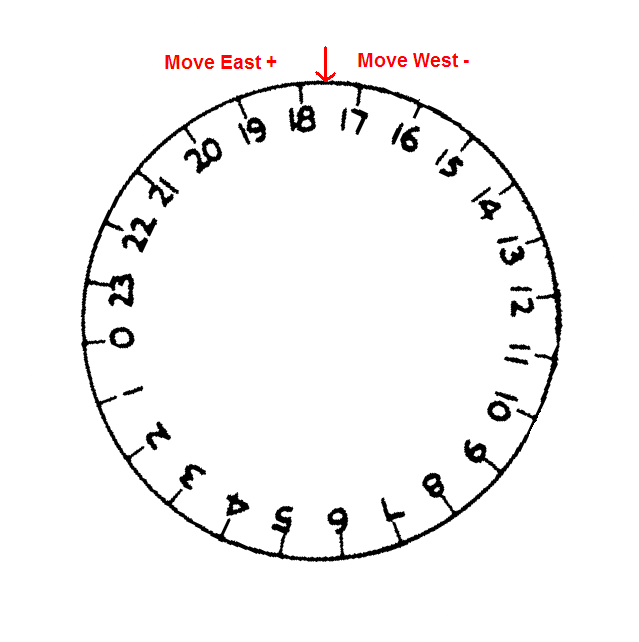
R.A. circle slipped to read RA 17h39m at iot Her
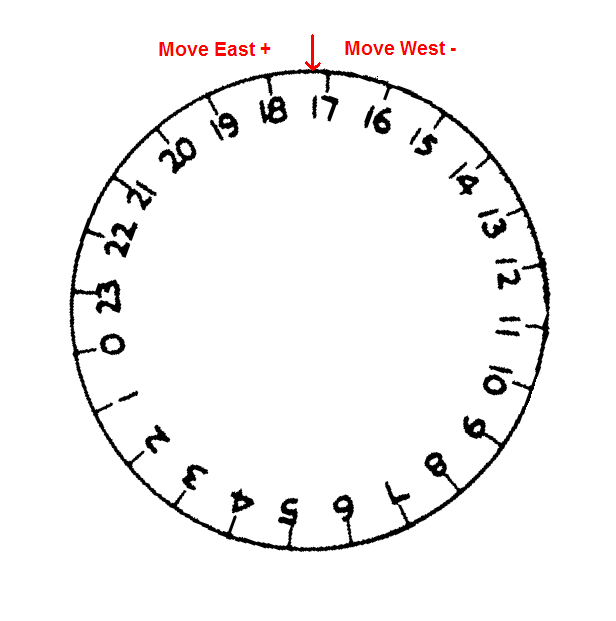
R.A. circle after minus west slew to M92 at RA 17h39m
The right angle slew only results in a small, subtle motion of the right ascension setting circle. The same process is applied to the declination tube of the mount and the declination setting circle's index.
Whether you use the right ascension index mark on the tube placed by the manufacturer - or a supplemental white-out index mark that you added to your scope - does not change the result. The motion is relative to the bright star. As long as you reset (that is re-slip) the setting circle to the bright star's coordinates using an index mark of your choosing, that index mark will register the correct relative slew to the target.
For deep-sky-objects like stars, clusters and galaxies, you can use catalogue J2000 coordinates - the object's position in the year 2000 - without determining their coordinates on the date of observation (the object's epoch-to-date coordinates). Deep sky objects move very slowly. Between a deep-sky-object and a bright reference star, their apparent relative positions will not change to a degree discernable visually for a over 100 years. In direct and indirect indexing, the scope is moved by the relative position between a bright reference star and the target.
For solar system objects, like planets, find the epoch-to-date position of the planet because solar system objects are relatively fast moving with respect to any nearby bright star. Online resources to generate a ephemeris for a planet (a table of its right ascension and declination by date and time) include:
- John Walker's "Your Sky" Online Planetarium program will display for your local horizon, a table that includes the epoch-to-date right ascension and declination for all the planets. In the Formilab online planetarium program, the universal time parameter can be set to your observing night and time.
- NASA/JPL Online Horizon's Ephemeris Generator is more difficult to use than John Walker's planetarium program, but once mastered, it produces accurate detailed epoch-to-date ephemeris tables for any planet at down to minute level intervals. This is particularly useful for fast moving solar system objects like the Sun, comets, and the inner planets Venus and Mercury.
As an example, on Oct. 7, 2007 at 3:00 UTC, the coordinates of Neptune (epoch-to-date) and of the nearest bright star, gam Cap in J2000, are:
Table: J2000 coordinates of gam Cap and epoch-to-date coordinates of M92 for Salt Lake City, Utah
Direction Object R.A. Dec. To Neptune 21h27m42" -15°16m12" From gam Cap 21h40m05" -16°39m44" Change ~-13m ~+1°20m For Microsoft Office users, a simple slew calculator in Excel 2003 that computes these differences is provided.
- By subtraction for indirect index offset
Indirect index offsetting is very similar to direct index slewing. The difference is you perform a little extra computation - the coordinates of the nearby bright reference star are subtracted from the coordinates of the target. See the example for Neptune and M92, above. If the RA difference is negative - the RA slew from the bright star to the target moves the telescope towards the western horizon. If the RA difference is positive, the slew from the bright star to the target moves the telescope towards the eastern horizon. In the preceding table, we have already found that moving from gam Cap to Neptune involves a slight minus RA slew (RA -13m) to the west and a plus declination slew to the north.
After pointing at the bright star gam Cap, slip the right ascension and declination circles to read zero at any index mark of your choosing. The scope is then moved the relative index distance to the target. The corresponding motion of the right ascension circle that results from you moving the telescope to the target Neptune is illustrated as follows:
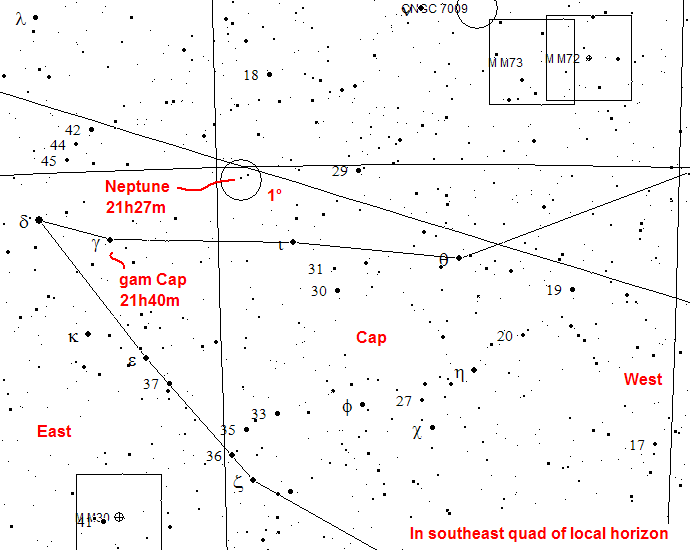
Slewing from gam Cap to Neptune
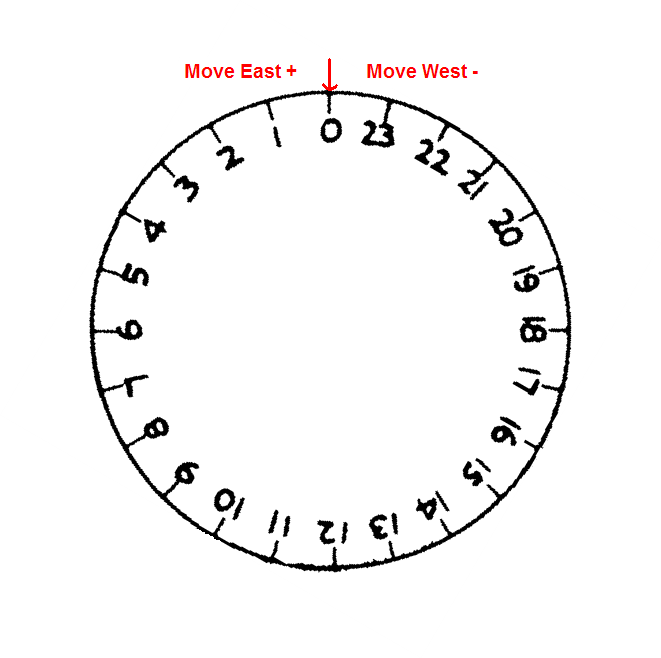
R.A. circle slipped to read RA0h0mm at bright reference star gam Cap
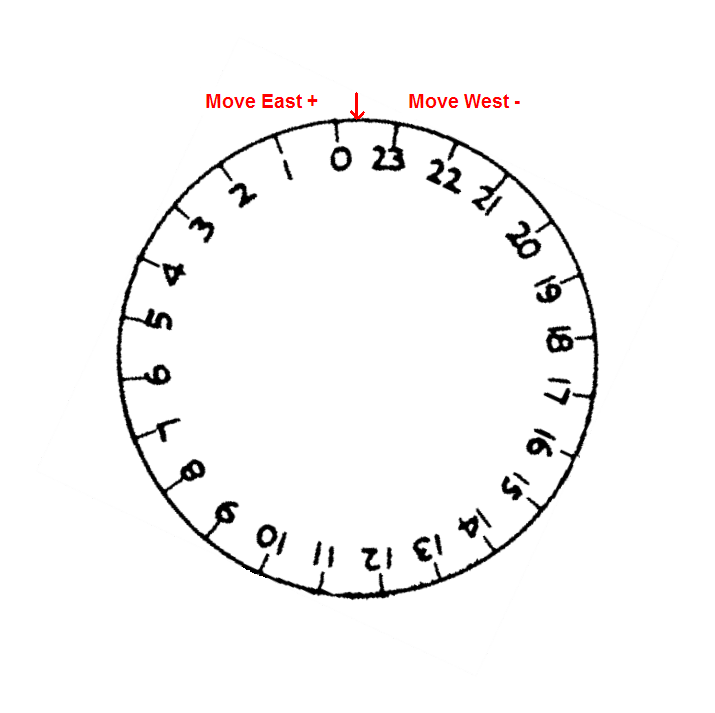
R.A. circle after minus west slew to Neptune at offset index of RA -13m
The process for the declination slew is the same, except it uses the declination setting circle.
- By the graphical method for indirect offset
- Apply the direct or indirect index to the telescope
There are two methods to use manual setting circles: direct indexing or indirect offset indexing. A "RA sweep" or "Dec sweep" are a specialized case of an indirect index offset slew. A spiral search pattern is another search alternative.
For all methods, first lookup the coordinates of the nearby bright reference star and target and perform any needed pre-computation, as discussed above. Optionally, use a planetarium program to print a supplemental star hopping chart down to a deep magnitude, e.g - v10-13. Such a chart is useful to confirm faint planet and galaxy target acquistion and to aid in star hopping.
- Direct indexing
- Unlock the scope and visually point and center in your eyepiece, the nearest bright star to your fainter target object. Relock the scope.
- Which right ascension setting circle index (the upper 0-24 or lower 24-0) that you use depends on the relationship of the scope's movement to the sky and the pointing of your scope in the eastern or western half of the sky. Just move the scope and see which right-ascension scale is matches the progression of right-ascension of the sky. For the northern hemisphere, usually the upper index marks matches the sky when facing south.
- Slip the right ascension and declination setting circles so they match the right ascension and declination coordinates of your bright star, read from the table above.
- Now unlock the scope or use the slow motion controls to right-angle
slew the scope in declination and right ascension so the setting circles
matches the coordinates of your target.
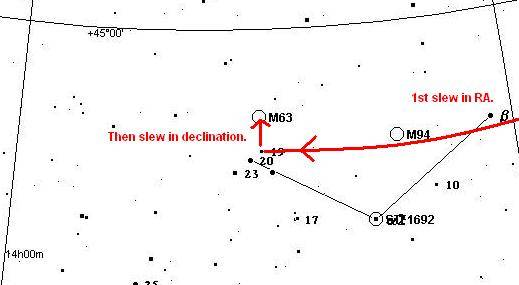
You have two choices for slewing to the target - first slew in right-ascension followed by a declination slew or first slew in declination followed by a right-ascension slew (hence the term "right-angle slew"). The best choice for the first slew is the slew that ends at some bright star asterism.
In the following left-hand illustration of slewing from bet CVn to M63, it is better to right ascension slew from bet CVn first, inorder to obtain the benefit of the asterism formed by 19 CVn, 20, CVn and 23 CVn. Then declination slew to M63. In the right-hand illustration of slewing from gam Cap to Neptune, first performing the declination slew is the better choice. This enables you to take advantage of the asterim formed by 42 Cap, 43 Cap and 44 Cap.
Slewing from bet CVn to M63

Slewing from gam Cap to Neptune
- Indirect or offset indexing
- Pre-compute the index offset from the bright reference star to the target, using the reference table, as demonstrated above.
- Unlock the scope and visually point and center in your eyepiece, the nearest bright star to your fainter target object. Relock the scope.
- Which right ascension setting circle index (the upper 0-24 or lower 24-0) that you use depends on the relationship of the scope's movement to the sky.
- Slip the right ascension and declination setting circles so they both read RA0 and Dec 0 at your choosen index mark.
- Direct indexing
Nearby M13 and pi Her illustrate the converse case - a right ascension sweep. pi Her and M13 have nearly the same declination. The difference in their positions is only in right ascension. A right ascension sweep is executed by centering on the bright reference star pi Her. Then the telesocpe is swept in right ascension only until it pans across M92. At pi Her, the right ascension setting circle is set to the star's right ascension coordinate: RA17h15m. The right ascension circle can be followed to approcimate when M13 will pan into view.
Slewing to Deep Sky Objects on the Messier and Caldwell Lists
The Messier and Caldwell lists are the core of beginner and beginner-intermediate observing programs. Those lists also cover the majority of objects target at public outreach star parties of local astronomy clubs. Pre-computed RA and Dec slews from nearby bright stars for the Messier list and the Caldwell list (above -38° declination) are provided as follows:
For both lists the right angle and declination slews are generally less than 7°s across 201 bright-star and object pairs. For the right-ascension portion of a right-angle slew, 85% of slews are less or equal to 7°. The median right-ascension slew is 2.9°. For the declination portion of a right-angle slew, 95% are less than 7°. The median is 2.1°. Of the above slew lists, the one organized by bright star name is more useful for beginners and for star parties. The primary sort of the bright star ordered list is by constellation. Once a constellation at a favorable altitude is located, the bright star ordered table can be consulted for which bright stars to center on. Usually there are one or two per constellation. The table lists the corresponding slews to popular Messier and Caldwell list entries. | 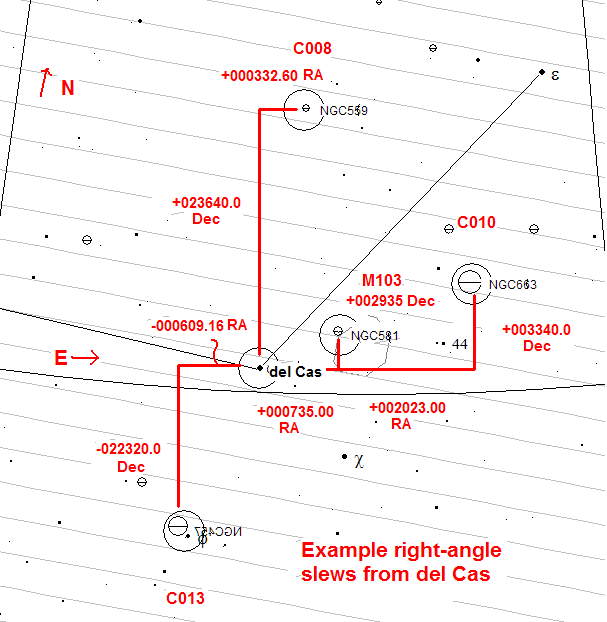
Right-angle slews from delta Cass |
A altitude-azimuth mounted scopes, a single html list cannot be generated do to differences in local horizon coordindate systems. A dynamic spreadsheet in Excel 2003 is provided:
A user guide for the spreadsheet is provided below.
Converting a minute of right ascension to an arcminute of declination
A minute of right ascension (RA) is not equal to an arcminute of declination - that is an arcminute measured in decimal degrees. Right ascension can be converted to declination mathematically in order to find the number of decimal degrees and the equivalent eyepiece TFOVs in a right-angle slew.
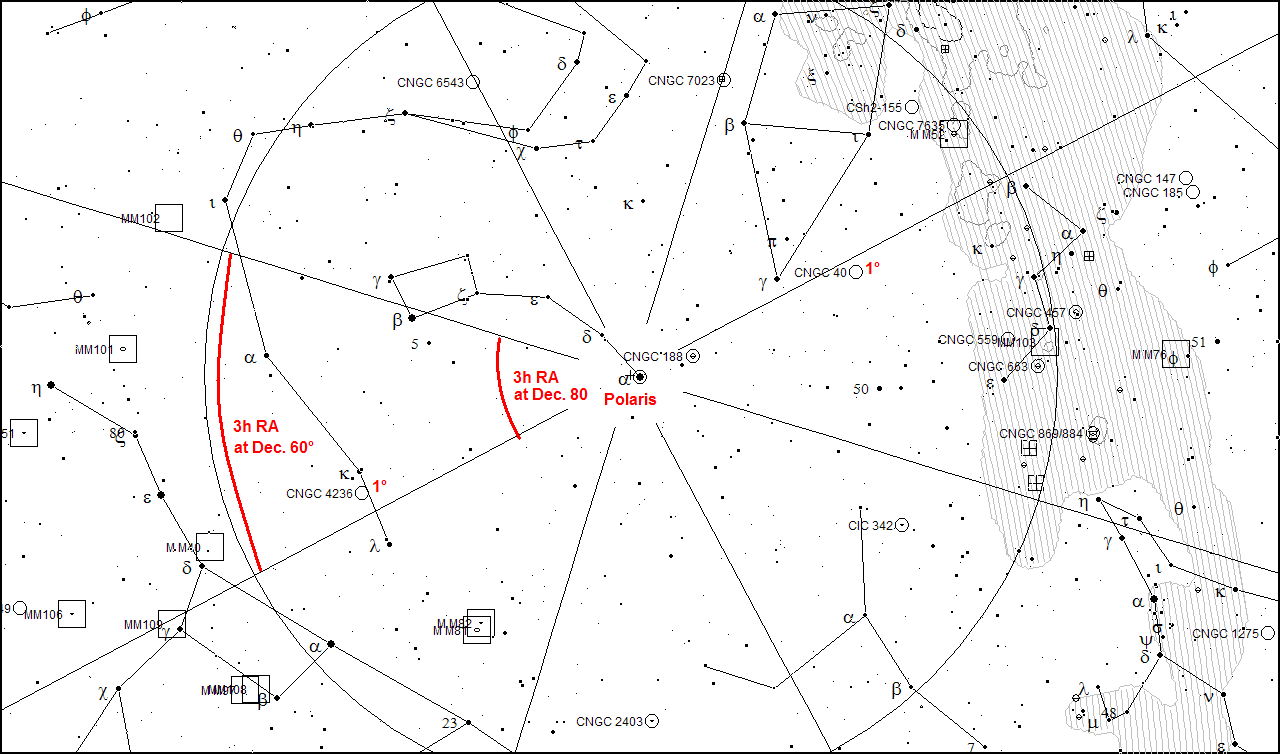
Mathematically, the shrinking decimal degree angular size of right ascension is compensated by an additional multiplier of cos(declination) times 15 decimal arcminutes for one right ascension minute. (See Supplemental notes.) Rather than getting bogged down in trignometry, the following is a simple rough conversion table:
In the M92 example, the right ascension slew of 22-23 arcmins of right ascension is equal to about 3.8-3.9° decimal ( [23 * ~10 multiplier ] / 60 arcmins per decimal degree). If you measure the declination degrees on a star chart and the right acension slew leg between iot Her and M92 (without any overlap as shown in the figure above), it is about 4 times the size of a declination degree mark on the chart.
In summary, to mathematically convert the right ascension slew in arcmins of right ascension to declination, estimate the multiplier from table provided above, or use the general formula:
arcmins decimal = 15 x arcmins right ascension x cos(radians(declination))
decimal degrees = arcmins decimal / 60
Worked examples
Find M92
See M92 example, above.
Find Neptune
See Neptune example, above.
Find Planetary Nebula NGC6826
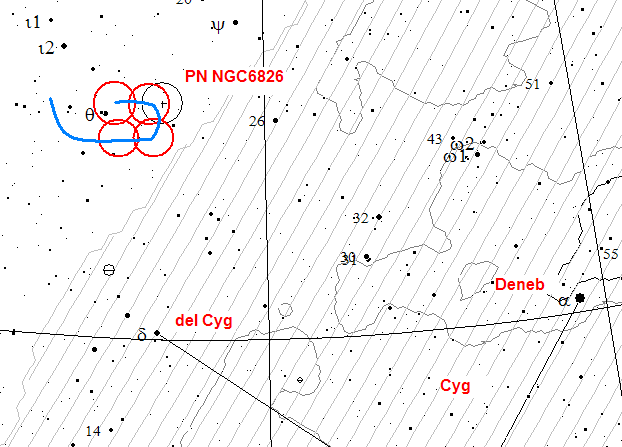
See NGC6826 example, above.
Supplemental Notes
- Marking the Orion EQ6 mount. The Orion Atlas EQ6 mount has some special performance behaviors that may warrant adding another set of marks above the right ascension setting circle. The Orion Atlas EQ6 (a branded Synta mount) is really designed to be used either manually with the power off or as GOTO scope with the power on. The setting circles remain fixed in place when the mount is powered in GOTO mode. With the power off and the scope right ascension axis unlocked, the right ascension setting circle moves with scope. However, in power off mode, the unlock levels are difficult to reach. Short-slews are really best done using the power-on hand-controller slew. The Atlas EQ6 can be run in a hydrid mode - the scope not goto aligned, tracking on or off and the motors used only for slewing with the hand-controller. Add four white-out marks above the right ascension setting circle at 90° intervals. Point the scope at a bright star. Lock the right-ascension lever. Slip the right-ascension circle to an index above the setting circle. Now use the hand-paddle to perform the short slew to the target. Conversely, if you are working only in power-off mode by locking and unlocking the right ascension lever, only use the additional index marks below the setting circle.
- Converting right ascension to decimal degrees
Decimal degrees equals Right ascension 360° = 24 hours right ascension 15° = 1 hour right ascension 15° = 60 minutes right ascension 1° = 4 minutes right ascension 1/4° = 1 minute right ascension 15 arcmins = 1 minute right ascension 15 arcmins = 60 seconds right ascension 1/4 arcmin = 1 second right ascension 15 arcsecs = 1 second right ascension
User guide for the Altitude-Azimuth spreadsheet
It is assumed that the user has a basic working knowledge of Microsoft Excel and Excel's drill-down capabilities via the "Data filter" menu option.
The spreadsheet uses Visual Basic for Applications (VBA) code to compute numerous values. You will need to respond "Enable macros" to the standard Excel security prompt to update the spreadsheet.
Only enter data in blue-background cells. Use notes by component spreadsheet and worksheet tab follow:
-
Mandatory worksheets in Spreadsheet MessierSlews.xls:
The following worksheets need to have key settings entered for the lists to properly display the altitude and azimuth slews for a particular location.
-
Worksheet SettingObservingPoint:
Enter the degrees, minutes and seconds for the latitude and longitude of your observing point. The spreadsheet automatically computes the decimal equivalents that are used in later worksheets. A storage area for your common observing points is provided. -
Worksheet SettingObservingTime:
This is the key worksheet that controls recalculation of all other worksheets, in particular the Main Catalogue. Enter your current UTC offset in Cell B5. Cells B30:C31 control computation of the rest of the worksheets. Enter a beginning and ending observing time range using UTC, not local time. Typically use a 2 to 4 hour range. Worksheet main catalogue indicates whether an object is visible within this time range. To force recalculation of all worksheets, change the time value in Cell B31. Time must be entered in the format "HH:MM:SS". A scratch pad for converting local to UTC time is provided by Cell F31. After recalculation, this worksheet provides for the current and planned beginning observing time: Julian Day, Local Sidereal Time, Rising LST, Setting LST, Solar position and Lunar position.Again, remember Cell B31 in this worksheet. It forces recalculation of all the remaining worksheets.
-
Worksheet MainCatalogue:
This is a key worksheet of approx. 201 objects on the Messier and Caldwell lists. The list can be filtered by the "Alt_obj_selector" column (column S) to limit display to those objects currently above the horizon.
-
-
Optional worksheets in Spreadsheet MessierSlews.xls:
The following worksheets contain either reference materials or do not materially alter the basic functioning of the worksheet to properly display the altitude and azimuth slews for a particular location.
-
Worksheet SettingRefernce-TimeZones:
Lookup your UTC offset value. Links to rules for applying Daylight Savings Time are provided. Tables for North America are provided. -
Worksheet ReferenceGreekLtrsConst:
Reference table of Greek letters and constellation name abbreviations. -
Worksheet SettingsTelescope:
In Section 1, enter the characteristics of the current telescope, barlow and eyepiece. This data is used in numerous worksheets to compute visibility, projection magnification and limiting magnitude. In Section 2, enter the characteristics of an observed star for the purpose of determining the telescopic limiting magnitude. Section 5 shows various resolution characteristics for the current telescope-eyepiece combination, e.g. the FWHM angular and linear sizes, the Airy disk radius, Dawes limit and Rayleigh's limit. A storage area is provided for data on your telescopes and binoculars. -
Worksheet SettingsSkySeeing:
Record your estimate of the current seeing condition in terms of the FWHM seeing disk. This data is used in later astrophotography estimation worksheets. Includes reference tables for Pickering's scale and Antonaidi's scale. -
Worksheet SettingsObserver:
Enter your age and experience scalar. This is used in limiting magnitude computations in later worksheets. -
Worksheet SettingSessionObservingRange:
Enter your usual degree altitude range for telescope and binocular observing. This is used in later spreadsheets for computing the visibility of objects. -
Worksheet SettingSkyBrightness:
Estimate your sky brightness in the magnitude and MPSAS systems. External content links to International Meteor Organization visual limiting magnitude areas are provided in Section 1. Sections 2 and 3 provide means to convert your Naked-Eye Limiting Magnitude Estimate into Magnitudes Per Square Arcsec (MPSAS). Enter these final values in Section 4. In later worksheets, this information is used to estimate whether an extended Deep Sky Object (DSO) will be visible. A storage area is provided for your common observing points.
-
References
Garrison, R.F. & Beattie, B. 1996. The Brightest Stars.
Kostjuk N.D. 2002. HD-DM-GC-HR-HIP-Bayer-Flamsteed Cross Index.
MacRobert, A.M. 2007. The Setting Circles on Your Telescope.
Acknowledgements
Centre de Données astronomiques de Strasbourg - Catalogue Service: This project has made use of numerous catalogues redistributed through the CDS Astronomer's Catalogue Service, operated at CDS, Strasbourg, France. The use of those sources by this reference is acknowledged and appreciated.
Chevalley, Patrick: Cartes du Ciel Planetarium Software. This project makes use of celestial charts prepared using Cartes du Ciel v. 2.76. The use of this source by this reference is acknowledged and appreciated.
No copyright asserted
No copyright is asserted to any original content materials developed and included by this author in this document and the same are released to the public domain. No copyright is asserted as to any scientific fact recited herein or to any external content materials incorporated in this document.
Site tracking by:
Revisions
- 10-10-2007: Corrected "arcminute of right ascension" to "minute of right ascension.
- 03-09-2008: Merged and expanded with Messier and Caldwell list pre-computed slewing tables.
- 03-10-2008: Added Cartes du Ciel external catalogue file
- 03-14-2008: Added simple slew calculator
- 03-26-2010: Revised Messier Caldwell slew tables for SAO reference star numbers
- 10-31-2010: Added cross-reference table for 1822 stars brighter than mag 5.5 - Bayer-Flamsteed-to-SAO
